MINISLIDE MSQscale
The MSQscale is based on SCHNEEBERGER's tried-and-tested MINISLIDE MSQ guideways and is available for the entire product range.
This extraordinary innovation combines guiding and measuring functions in a highly integrated design. MSQscale makes the most compact applications possible and significantly simplifies assembly and installation. As a result, the MSQscale is an extremely economical solution which meets stringent technical requirements.
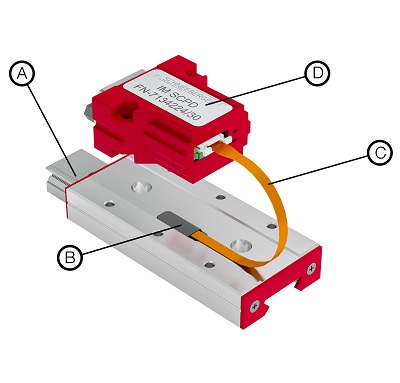 MSQscale working method and components
The MSQscale is an optical, incremental measuring system made up of the MINISLIDE MSQ guide system and the following additional components:
A. Dimensional scale on the guide rail
B. Optical sensor integrated into the carriage
C. Flexible print (must not be exposed to dynamic loads)
D. Interface module
The high-precision dimensional scale is part of the hardened guideway's surface. The sensor records the optical signals and supplies the raw signals. These are produced in the interface module in either analog or digital format, and can be processed by the customer.
Options
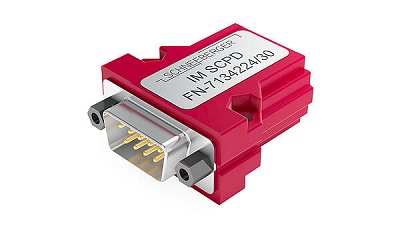
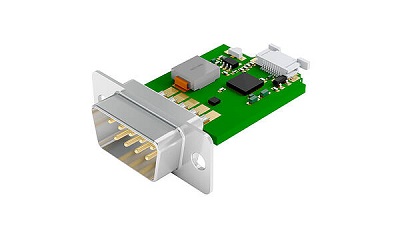
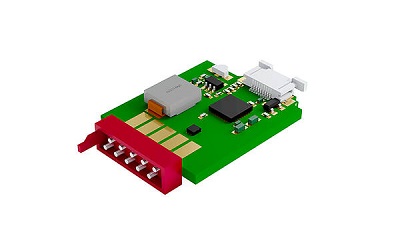
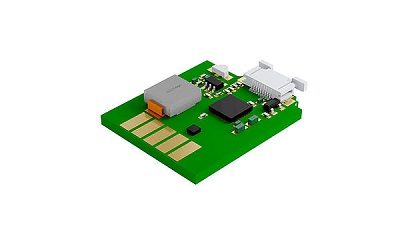
There are four structural types of interface modules available:
D-Sub 9 connector with housing
| D-Sub 9 connector without housing
|
Without housing with Micro Match connector
| Without housing, Without connector, With soldered connections
|
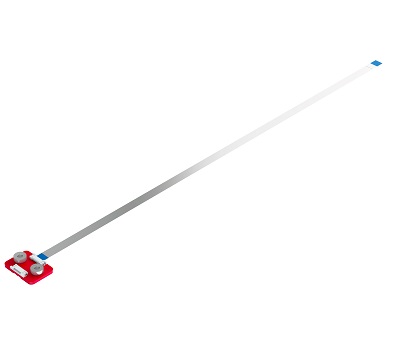
A flexible flat ribbon cable (flat flex cable, or FFC) can be used between the flexible print and the interface module if the flexible print for the sensor is too short in the application. This will enable the interface module to be positioned in a flexible way. These cables can be exposed to dynamic loads.
FFC cables are available in three lengths: 250mm, 400mm and 600mm.
Technical Data
| System lengths in mm: | Strokes in mm: | |
| MSQscale 7 | 30mm - 70mm | 20mm - 58mm |
| MSQscale 9 | 40mm - 80mm | 34mm - 66mm |
| MSQscale 12 | 50mm - 100mm | 45mm - 70mm |
| MSQscale 15 | 70mm - 130mm | 66mm - 102mm |
Performance parameters:
| Resolution (4) | TTL output 0.1 μm (optional: 1 μm / 10 μm) |
| Accuracy (4) | +/- 3 μm |
| Repeatability (4) | Unidirectional +/- 0.1 μm Bidirectional +/- 0.2 μm |
| Dimensional scale | Pitch 100 μm Coefficient of expansion 11.7 x 10⁻⁶ K-1 |
| Preload | Zero backlash |
| Materials: | |
| Guideways, carriages, balls | Stainless steel, through-hardened |
| Cage and pinion | PEEK |
| End pieces | PEEK |
| Max. acceleration | 300 m/s² |
| Max. speed | 3 m/s |
| Areas of application: | |
| Temperature range (1) | -40°C to +80°C (-40°F to +176°F) |
| Vacuum (2) | High vacuum (max. 10-7 mbar) |
| Humidity | 10% - 70% (non-condensing) |
| Cleanroom | Cleanroom class ISO 7 (in accordance with ISO 14644-1) |
| Supply Voltage | 5 V DC +/- 5% |
| Current consumption | 60 mA (analog) / 70 mA (digital) |
| Output signal | Analog: 1 Vss (at 100 Ω) Digital: TTL in accordance with RS 422 standard |
| Source format | Analogue: Differential sin/cos analogue signals with reference pulse or Digital: Differential, interpolated digital signals (A, B, R) The reference signal is synchronized with the incremental signals |
(1) The standard lubrication covers a temperature range from -20°C to +80°C. Lubricants for other temperatures are available upon request from Schneeberger.
(2) The suitability for a vacuum depends on the material used. In order to use MSQscale in a vacuum, the front plates must be removed. There are also restrictions on the use of sensor accessories. Use in a vacuum requires a special lubricant available from Schneeberger. Please get in contact with us for details on vacuum application.
(3) Note the high signal frequencies at high resolution and high speed.
(4) The values apply at 20°C (68°F)

